You can connect your Voluum tracker accounts and see accurate conversion and revenue data on TheOptimizer.
Step 1: On Account Wizard, select the Facebook ad accounts you want to connect to Voluum, then click on Next.
Step 2: In the second step of the Account Wizard, click on Add New to start connecting your Voluum account.
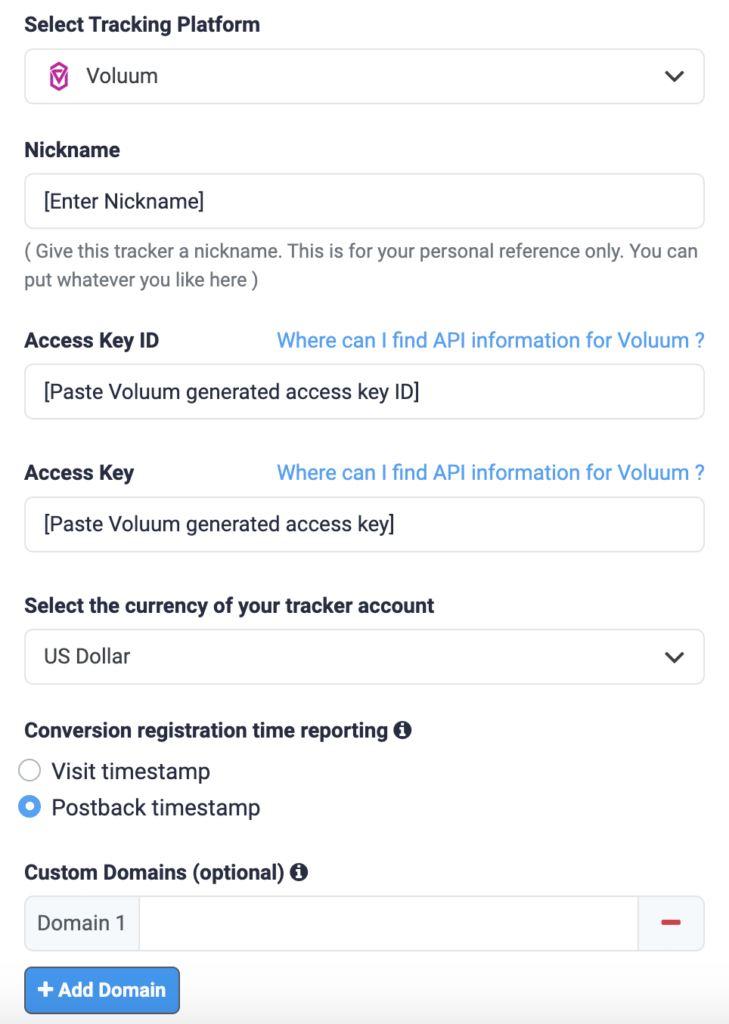
Step 3: On the pop-up integration screen, click on the Select Tracking Platform drop-down list and select Voluum. Here, you will need to fill in some information.
💡NOTE: You can find your Voluum Access Key ID & Access Key information by logging into your Voluum account and going to Settings > Security > Access Keys. Click Add new key.


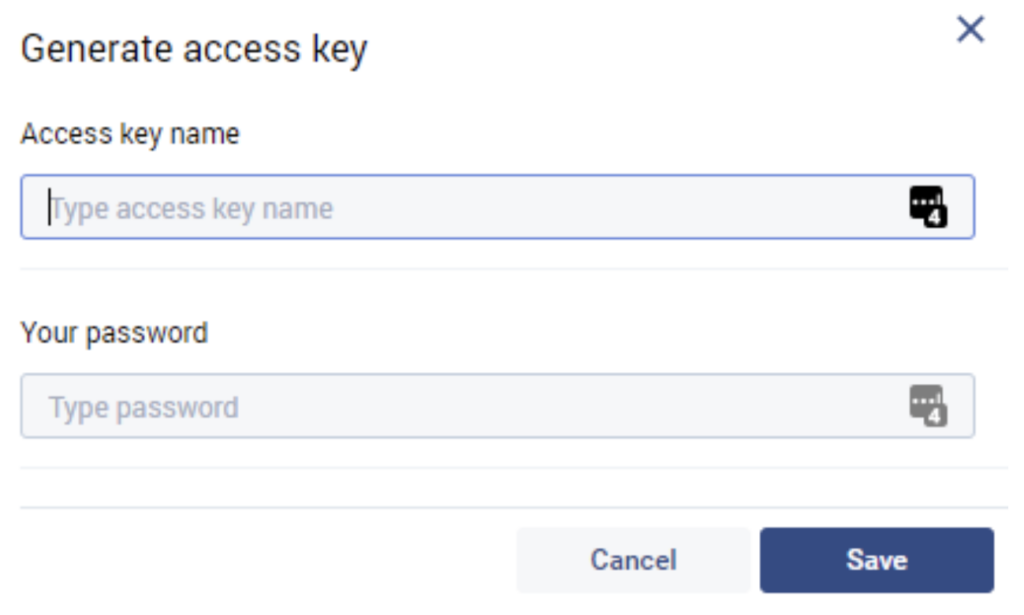
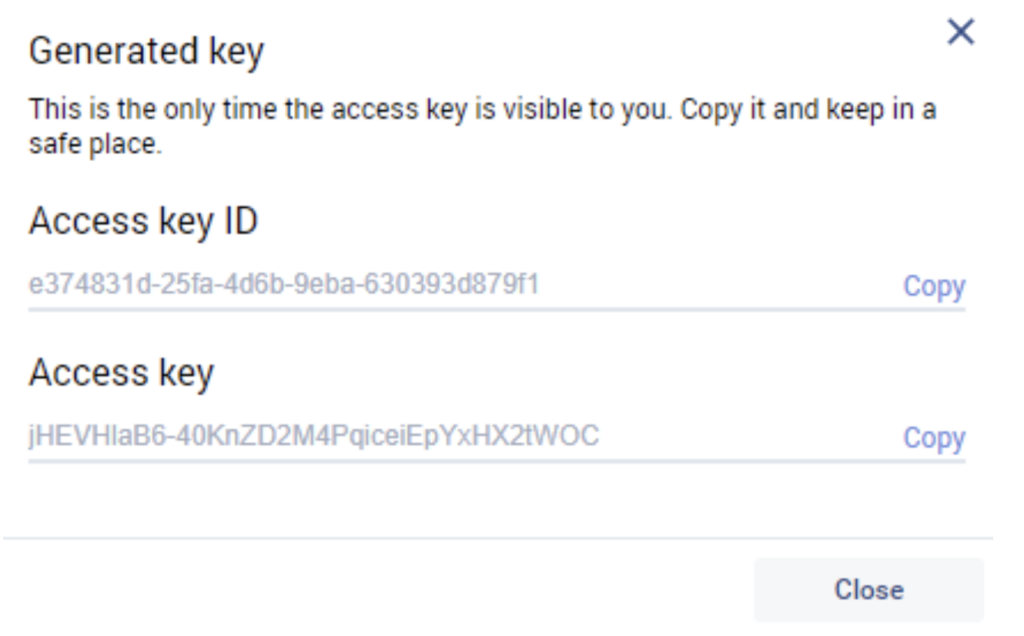
Generate Access Key > Enter the name and password, then click Save. Copy the generated details and paste them on TheOptimizer.

Step 4: Fill in all your Voluum account information, such as the account nickname, the Access Key you copied in the previous step, the tracker currency, and the conversion registration time reporting, as specified on your Voluum General Settings. Entering Custom Domains is optional, you can add custom domains used to generate your campaign links on Voluum (besides your default Voluum tracking domain).

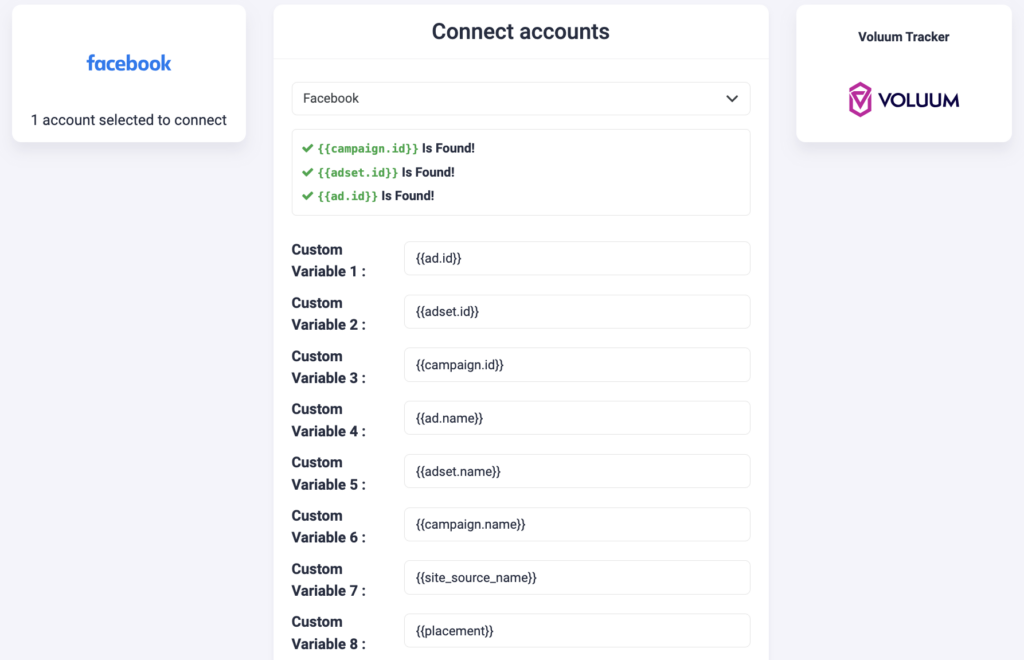
Step 5: In the final step, you simply need to specify which of the traffic source configurations found in your Voluum tracker belongs to the Facebook account added or selected earlier.

As you may notice from the above screenshot, please make sure all the required traffic source tracking tokens are already present in your Voluum traffic source configuration.
💡NOTE: In case one of the required traffic source tracking tokens is missing in your tracker configuration, please make sure that besides updating the traffic source configuration on your tracker, you update your current campaign links as well otherwise your campaigns’ statistics may be inaccurate.
Next step: Start automating
Click here to learn more about Facebook automation rules, with examples.
