To enhance your experience in reading and analyzing your campaign data, it’s crucial to adjust the column view to match your need. Follow the steps below to personalize your column views:
Built-in suggested column presets
The quickest way to get started is to use the suggested column presets. There is a list of suggested column presets for each traffic source which are also tailored based on the connected tracking platform or search feed provider.
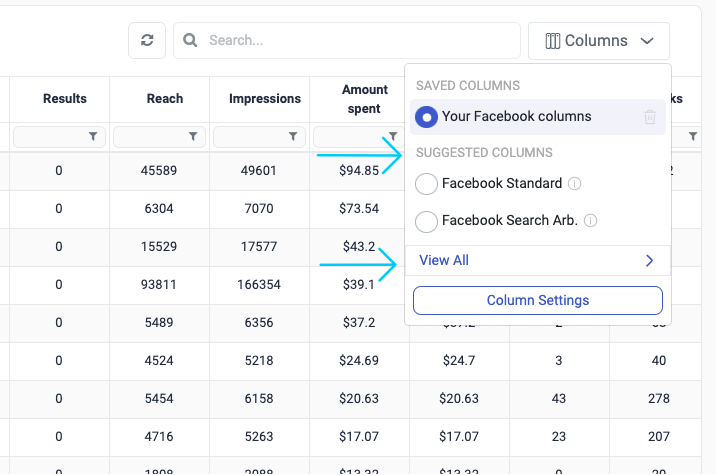
To see the list of available suggested presets:
- Click on the Columns button on the top-right corner of the table.
- Look for the Suggested Columns section.
- Select a suggested preset from the list to load it.
- Click on “View All” to see all suggested presets.
Create your own column view
To create your own column view you can:
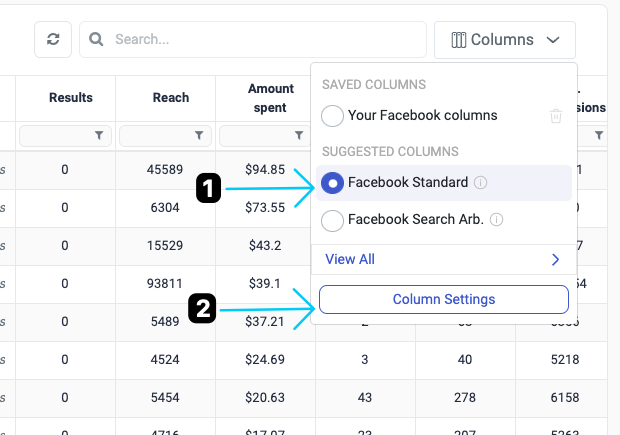
- Start by loading an existing preset.
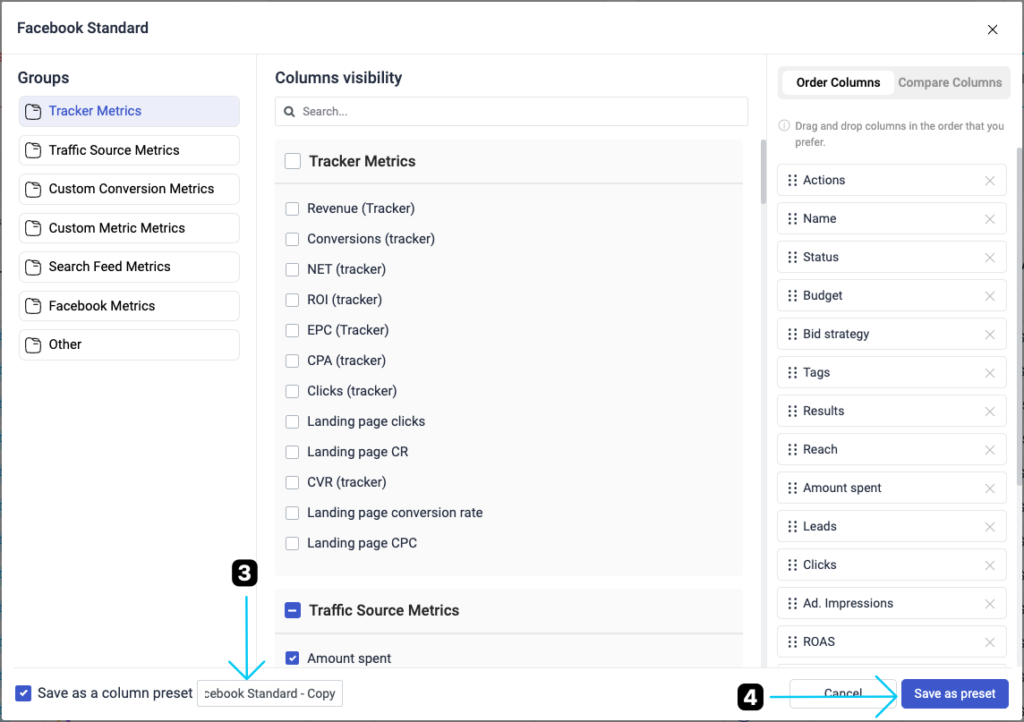
- Click on Column Settings and customize the view accordingly by adding, removing columns, or adjusting their order.
- Enter a name for the new preset.
- Click Save as preset when you are done.
Share a preset with your team
Once you have created your own custom preset you can share it with your other team members by making it public. Once public the preset will show up to other users as well and they will be able to use it.
To make a preset public follow the steps below:
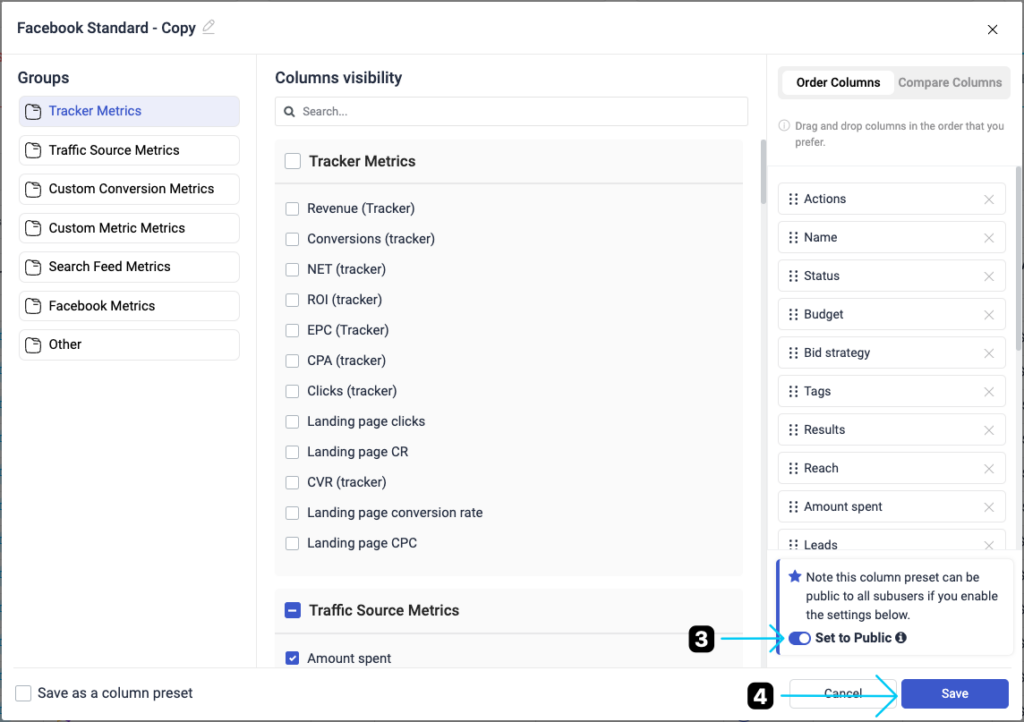
- Start by loading an existing preset.
- Click on Column Settings to open the edit mode
- Turn on the “Set to Public” switch.
- Save
Adding or Removing Specific Columns
Follow the steps below to add or remove specific columns in your table views.
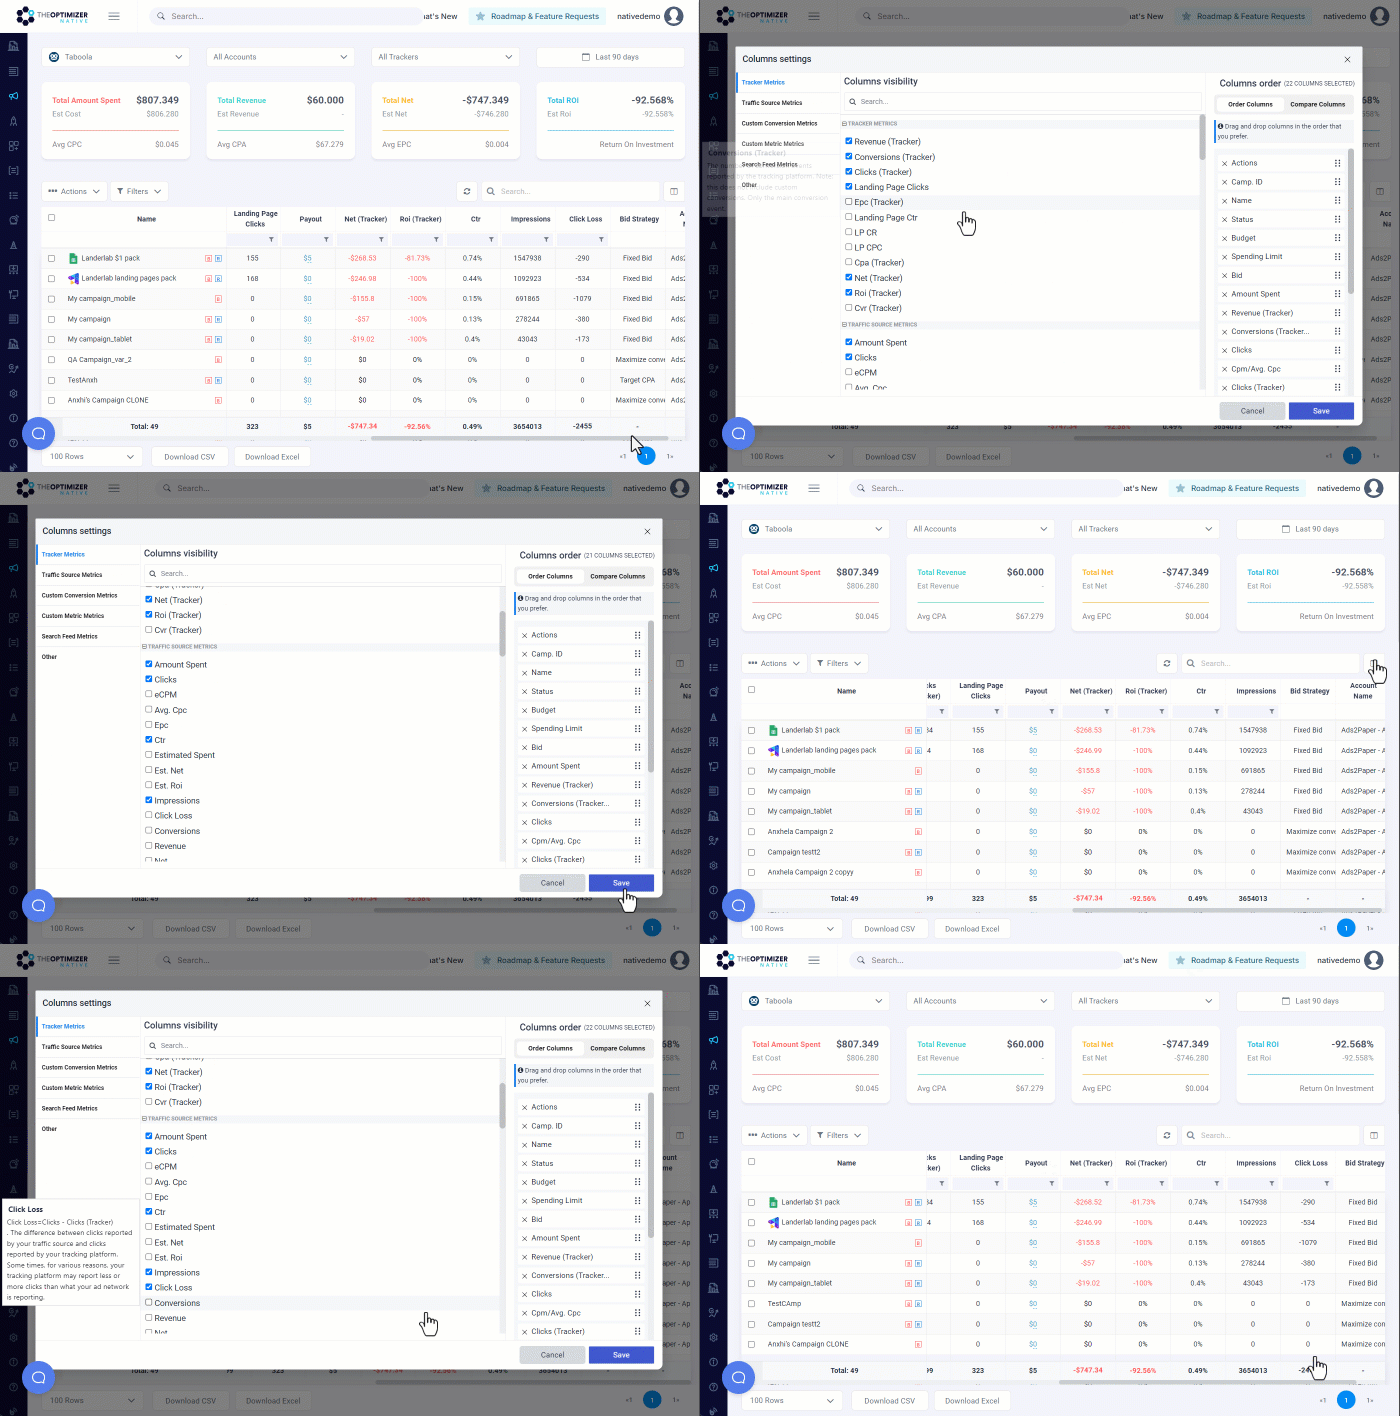
- Click the column settings button at the top-right corner of your table.
- Scroll through the list of available columns or type the name of the column
- Select the check box on the left of the column name to add a column, or uncheck to remove it.
- Click Save to save the changes.
Changing Columns View Order
To change your columns’ order in TheOptimizer follow the below steps.
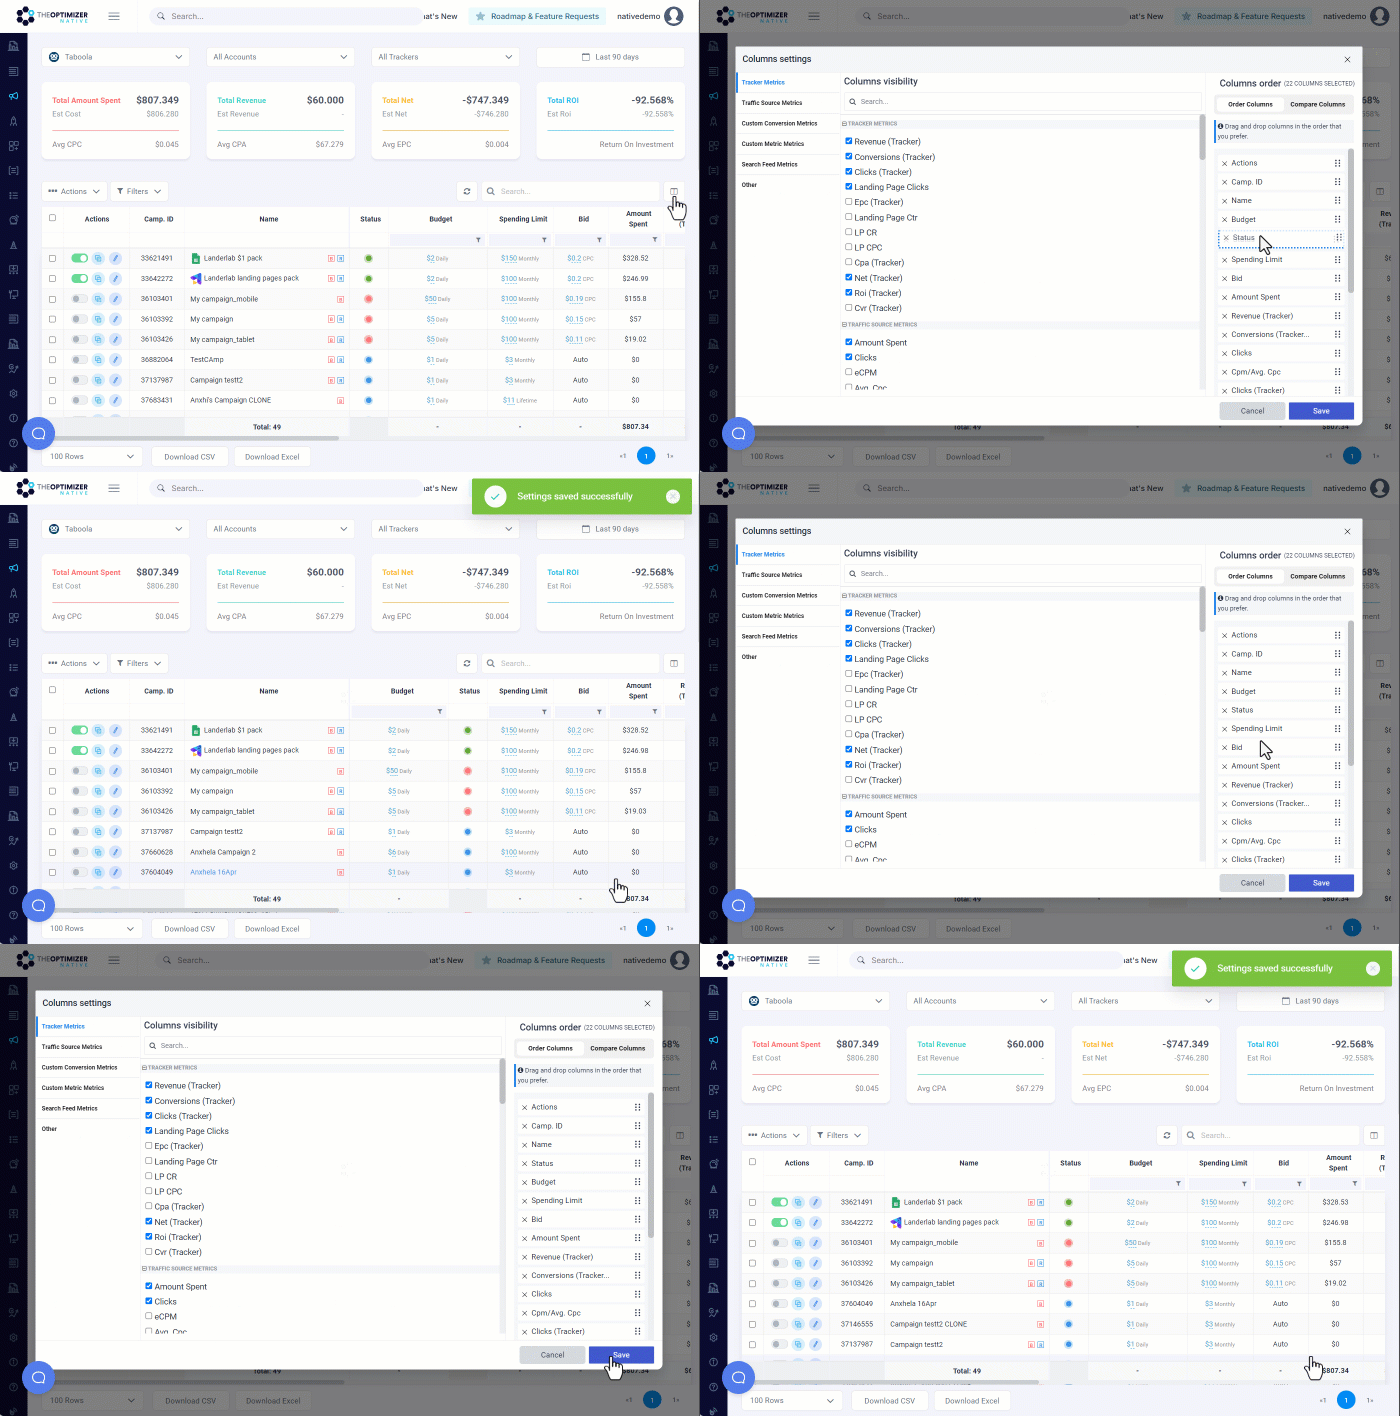
- Click the column settings button at the top-right corner of your table.
- Click and hold on a column name, then drag it to the desired order relative to the other columns.
- Click Save to save the changes.
