This article will guide you through the step-by-step process of connecting CPV Lab Pro to TheOptimizer
![]() Written by Losid Berberi. Updated over a week ago
Written by Losid Berberi. Updated over a week ago
Once you have already connected one of the supported traffic source accounts in the first step of the Account Wizard process, now you can proceed with connecting your tracking platform in order to leverage the power of automatic campaign optimization.
Please follow the guide below on how to connect your CPV Lab Pro tracker account to TheOptimizer.
Step 1: Click on Account Wizard on the left side menu of your screen.
Step 2: Select one of the previously connected traffic source accounts and click Next.
Step 3: Click the Add New button in the Tracker Setup step of the account wizard.
Select CPV Lab Pro tracker from the first drop-down menu in the new tracker configuration dialog, then fill in the required information and click Save Tracker to move to the next and final step.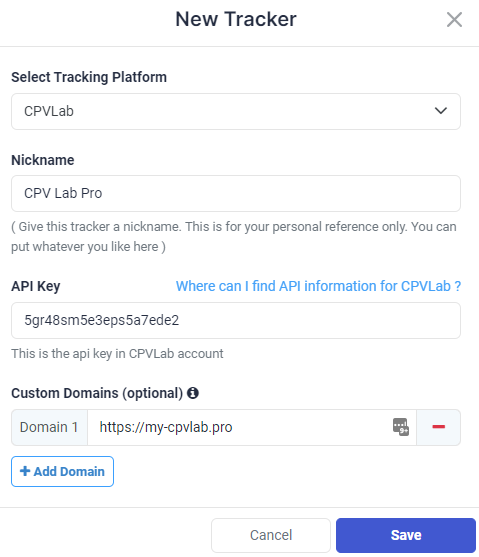
In this final step, you simply need to specify which of the traffic source configurations found in your CPV Lab Pro tracker belong to the traffic source added or selected in the first step of the Account Wizard.
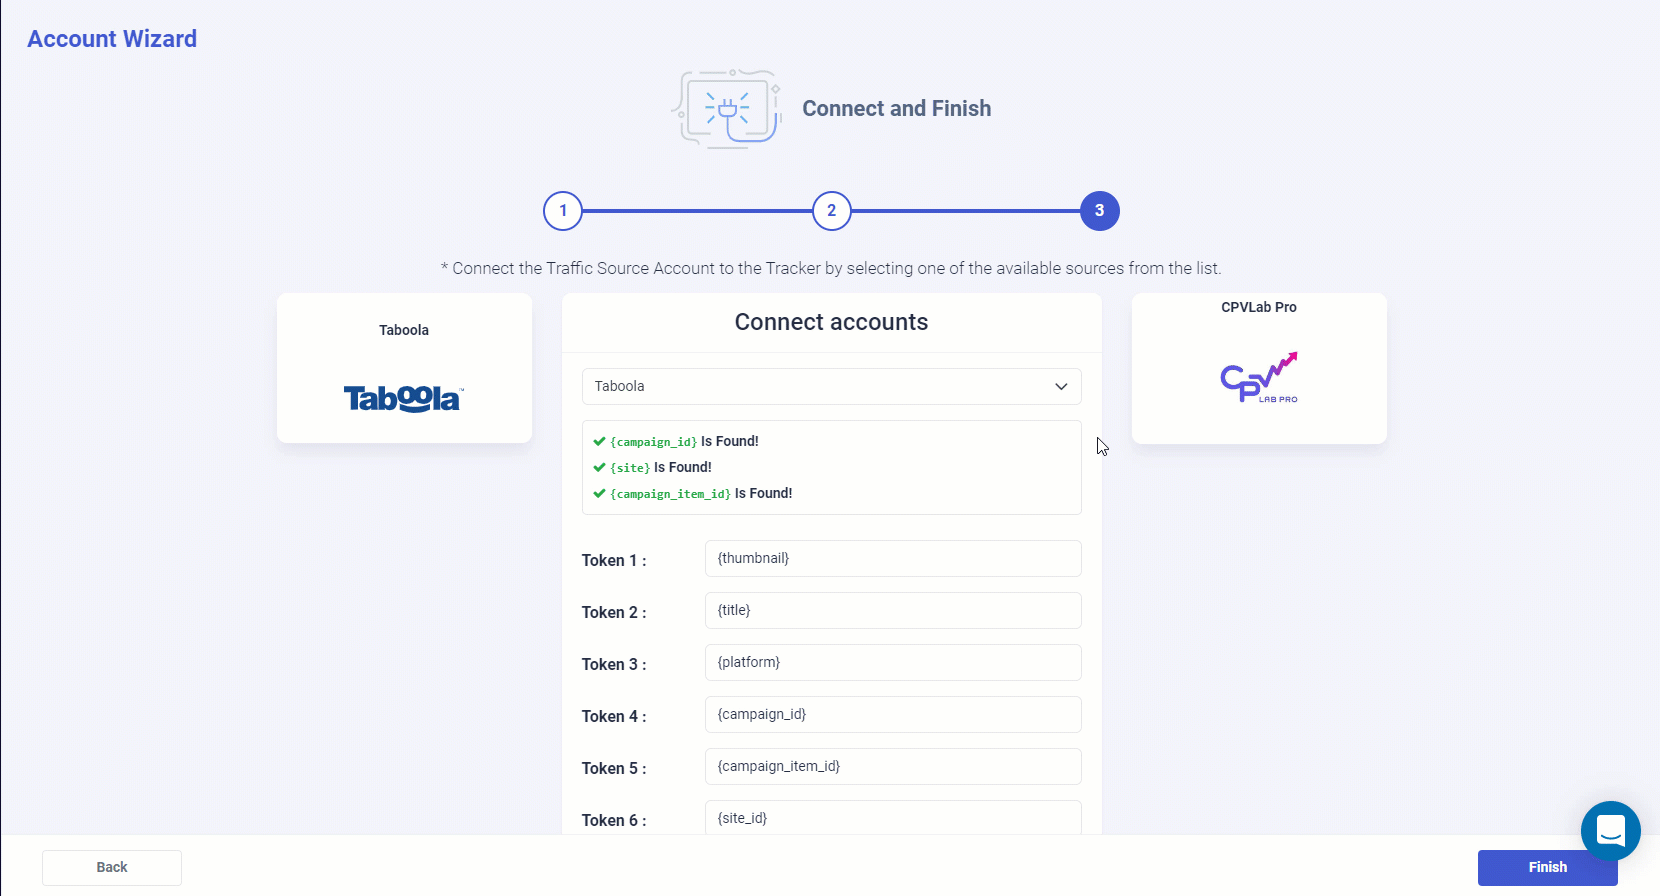
As you may notice from the screenshot above, please make sure all the required traffic source tracking tokens are already present in your CPV Lab Pro traffic source configuration.
Important Note! – In case one of the required traffic source tracking tokens is missing in your tracker configuration, please make sure that besides updating the traffic source configuration on your tracker, you update your current campaign links as well otherwise your campaigns’ statistics may be inaccurate.
Where do I find the API Information?
In case you don’t know where to find the API information on your CPV Lab Pro tracker please refer to the instructions below.
Log in to your CPV Lab Pro instance then go to Settings > General Settings > API.
