
Ad Network Navigation
At the very top of the Campaign Manager you will find the ad network navigation bar. Every ad network you have connected to TheOptimizer appears here as an icon. Clicking an icon switches the entire campaigns view to that network — showing only campaigns, ad sets, and ads that belong to it.Ad Accounts Filter
Directly to the right of the ad network icons is the Ad Accounts filter. Instead of being locked to a single ad account at a time like in native ad managers, you can view and manage campaigns across all your accounts simultaneously — or narrow down to exactly the accounts you need. Your selected accounts act as a persistent scope — all other filters and data in the view apply only within those accounts.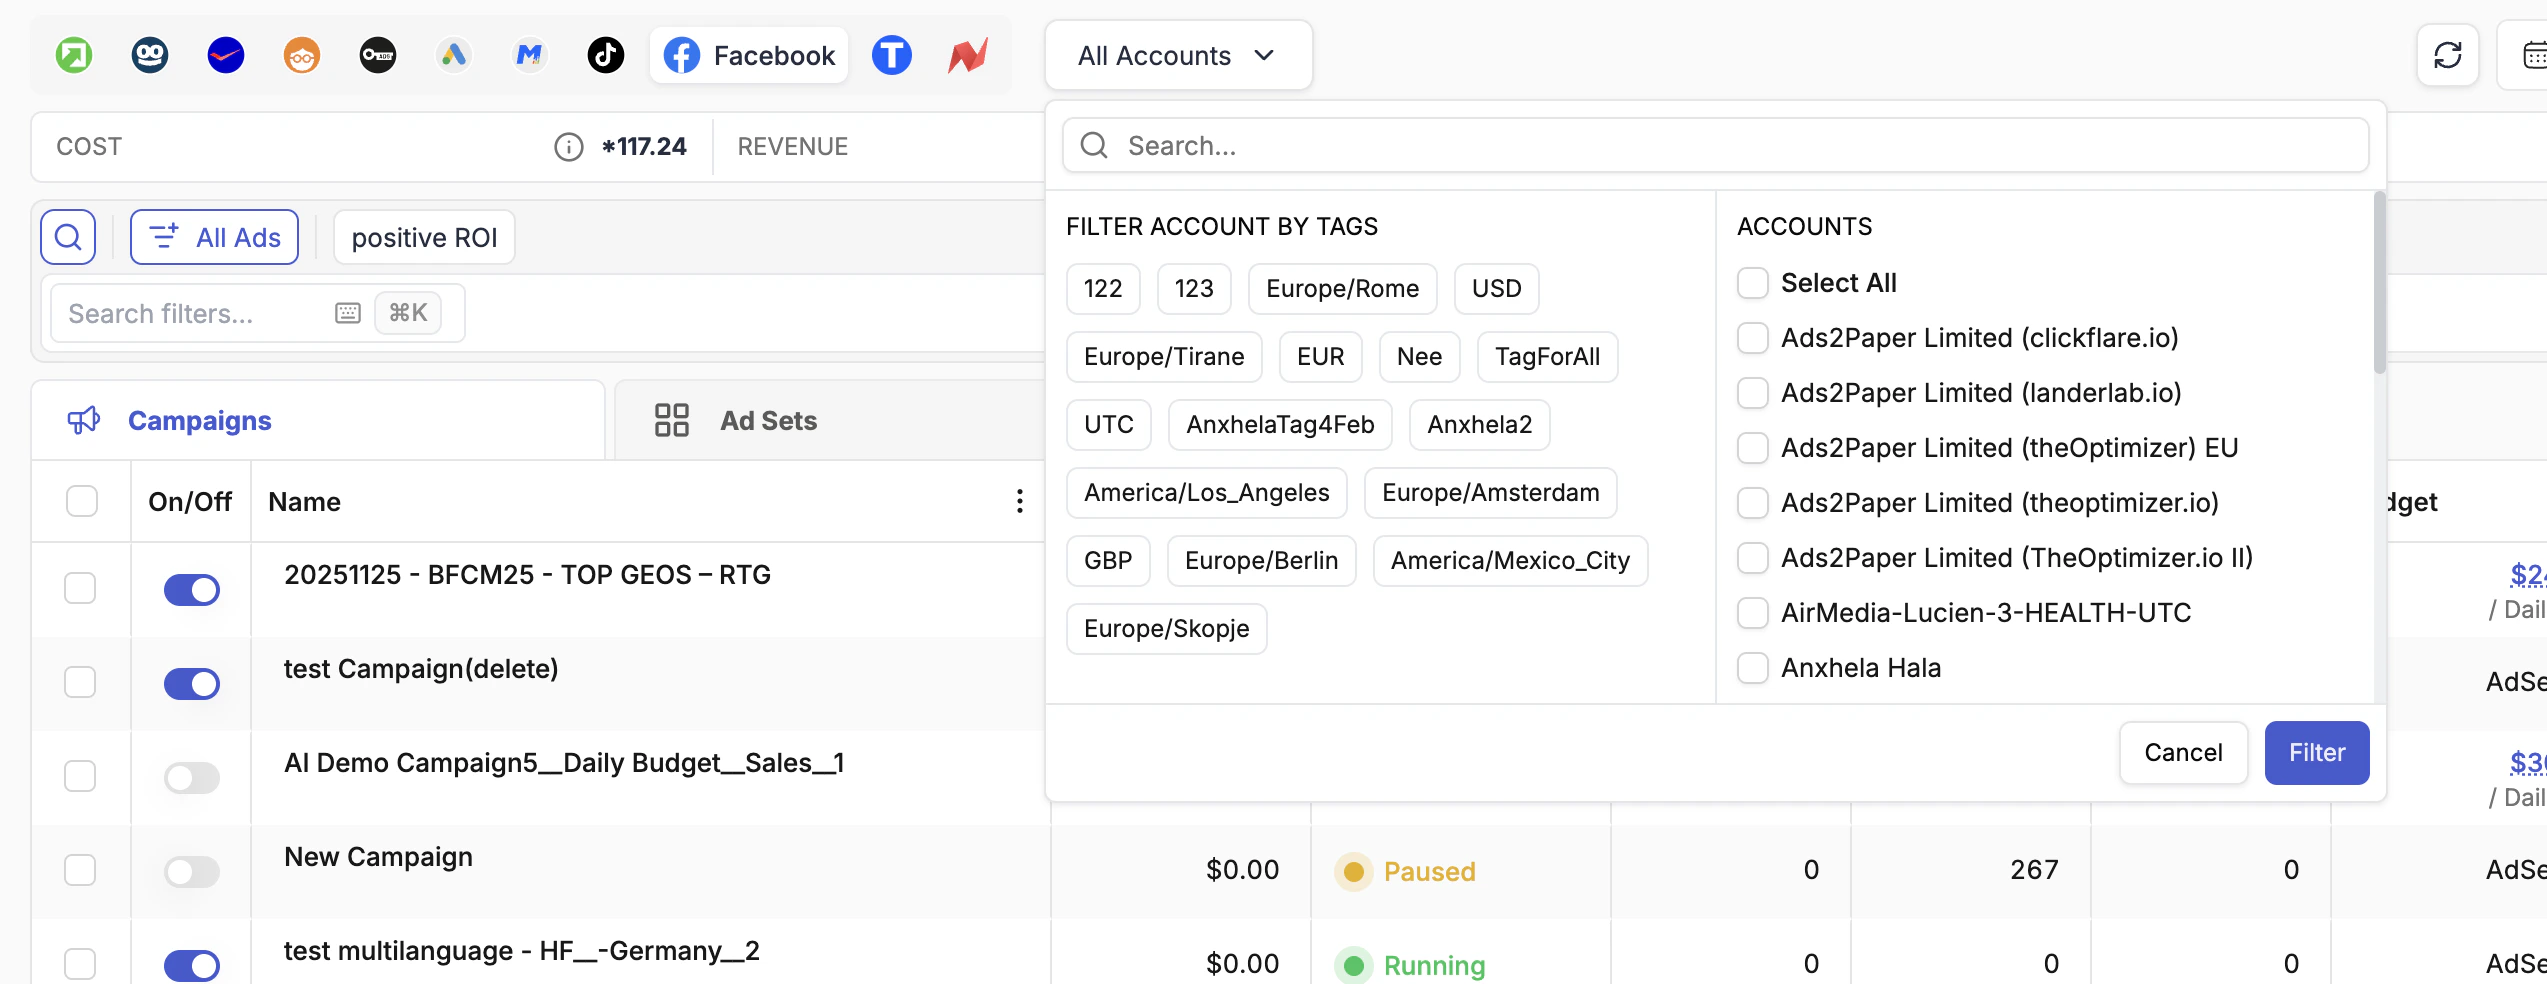
Filtering by Tags
TheOptimizer automatically assigns two tags to every ad account when it is connected:- Timezone tag — the time zone configured on that account (e.g.,
UTC,America/Los_Angeles) - Currency tag — the currency of the account (e.g.,
USD,EUR,GBP)
Searching for Specific Accounts
Inside the ad account filter, type to search for accounts by name. Select one or more accounts and click Filter to scope the Campaign Manager to only those accounts.Campaigns, Ad Sets & Ads
Three tabs sit above the main table: Campaigns, Ad Sets, and Ads (some networks use “Ad Groups” instead of “Ad Sets”). Each tab shows all items of that type across every selected ad account.- Clicking a tab with no items selected shows all items of that type across your accounts — a cross-account view you cannot get in native ad managers.
- Selecting one or more campaigns on the Campaigns tab and then switching to Ad Sets filters the list to show only the ad sets belonging to those campaigns.
- Selecting ad sets and switching to Ads filters to show only ads within those ad sets.
Filters
The filtering bar sits below the Totals Bar and lets you search and filter campaigns, ad sets, or ads by virtually any metric or attribute. Click the Search filters… box to open the filter panel.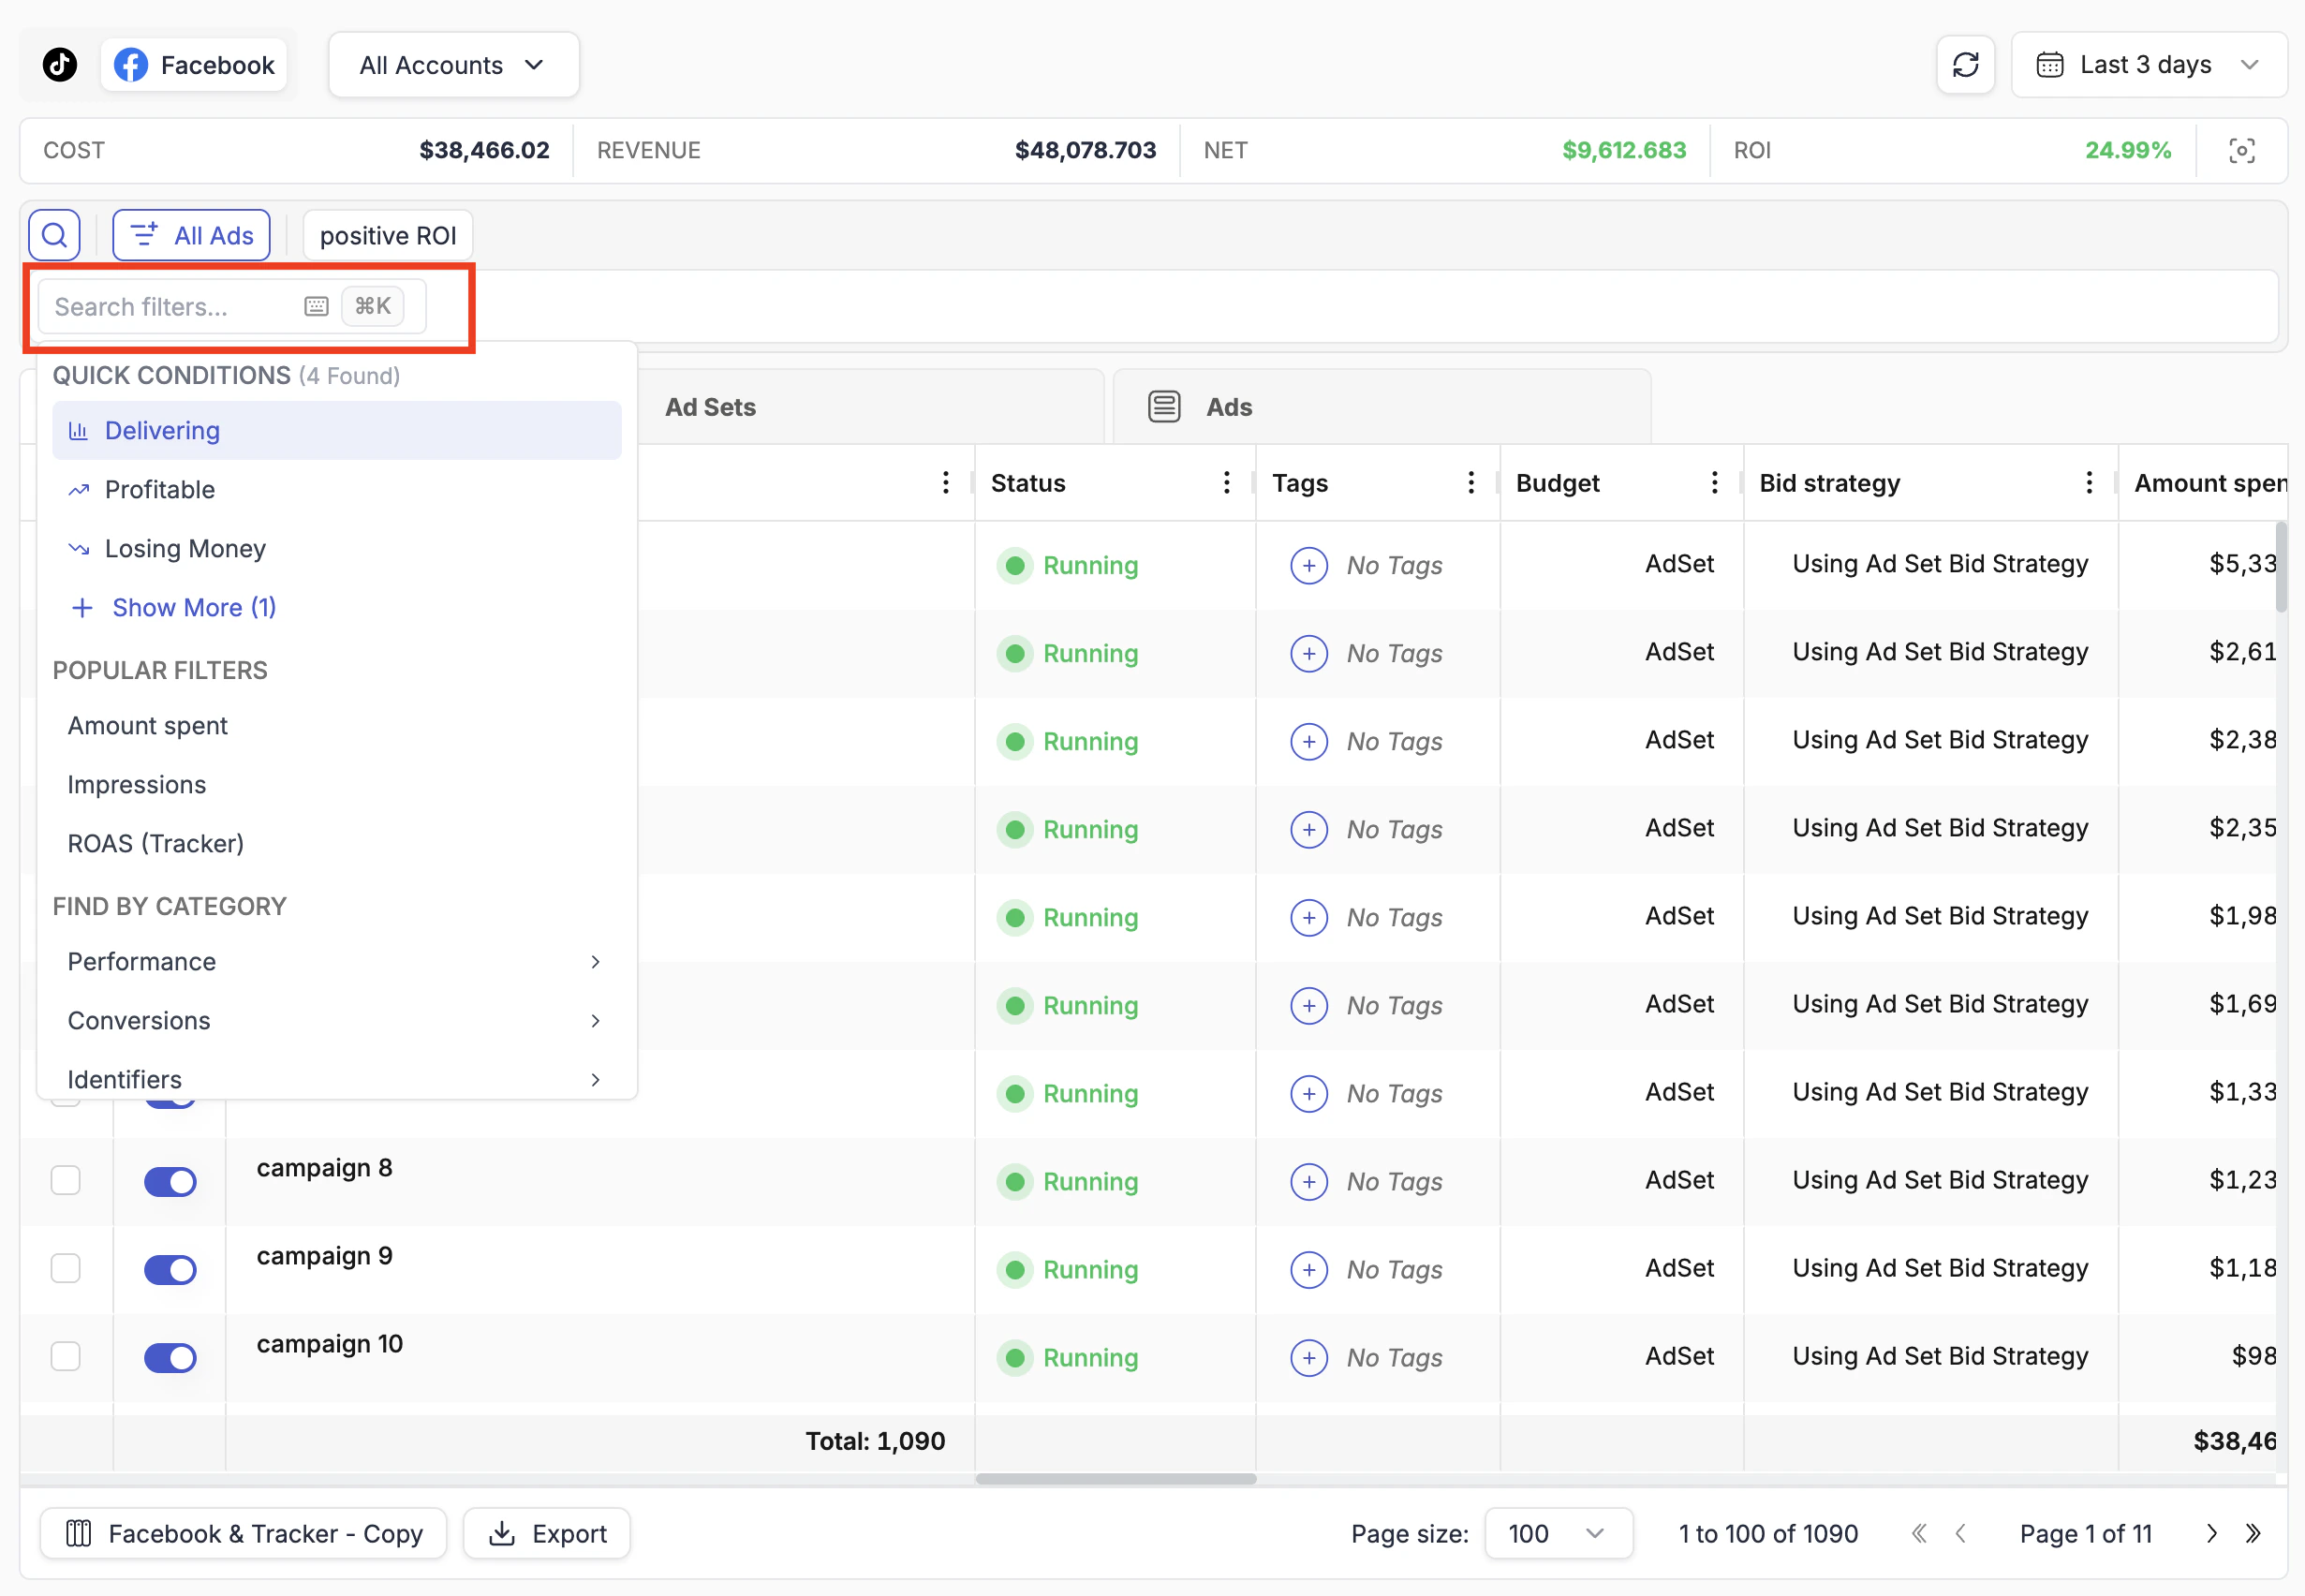
Quick Conditions
At the top of the filter panel, Quick Conditions are pre-built single-click presets for the most common needs:- Delivering — items with Impressions > 0 (receiving active traffic)
- Profitable — items with NET Profit > 0
- Losing Money — items with NET Profit < 0
Popular Filters & Categories
Popular Filters is a dynamically generated list of the filters you use most frequently. It updates as you work, surfacing the metrics you reach for regularly. Find by Category is a structured directory of all available filter metrics:| Category | What it contains |
|---|---|
| Performance | Spend, impressions, clicks, CTR, CPC, CPA, ROI, revenue, NET, and other core metrics |
| Conversions | Traffic source conversions, tracker conversions, and custom conversion events |
| Identifiers | Campaign, ad set, and ad names and IDs — useful for filtering to a specific item by name |
| Other | Tags, budgets, start dates, statuses, and other non-metric attributes |
Saving Custom Views
Once you have built a filter combination you want to reuse, save it as a View.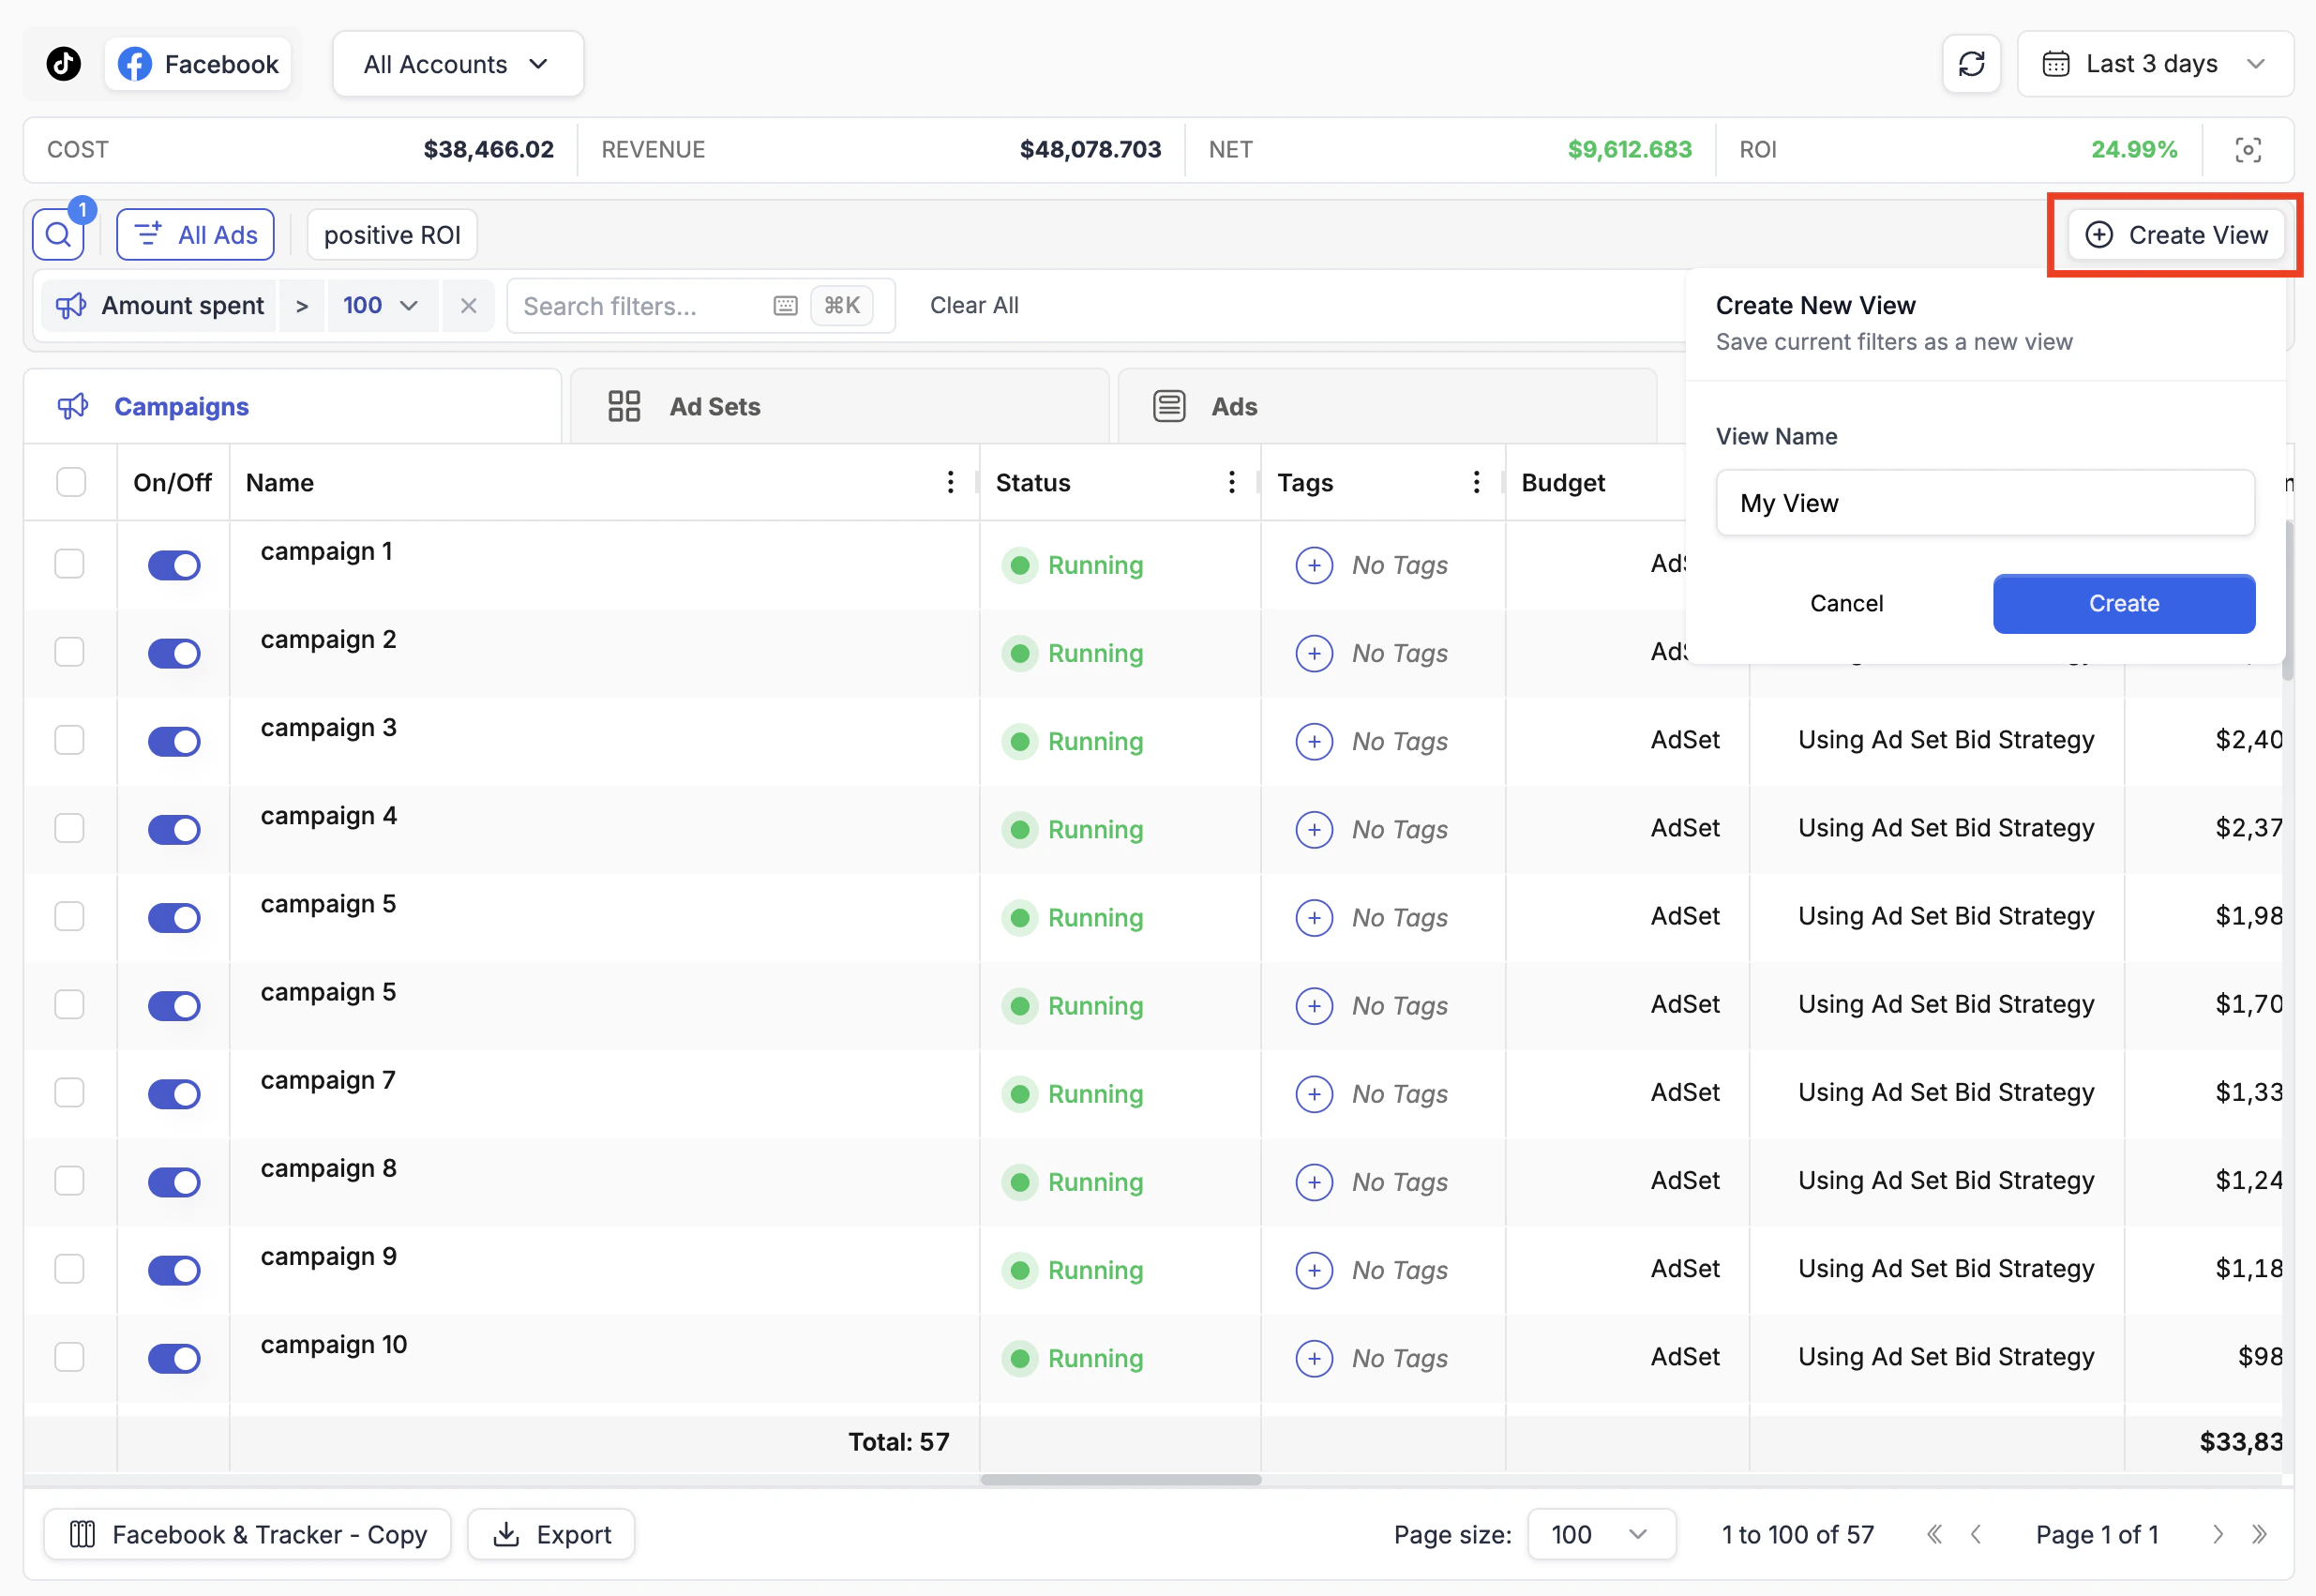
Click Create View
When at least one filter is active, a Create View button appears at the right of the filtering bar. Click it.