
Where to Find Your API Key
Log in to FunnelFlux Pro → go to your Account Settings → open the API section → copy the API Key shown.Connecting to TheOptimizer
Open Integrations
From the left-hand menu, go to Integrations. Scroll to the Tracking Platforms section, find the FunnelFlux Pro card and click Connect →.
Enter Your API Credentials
Fill in the connection form: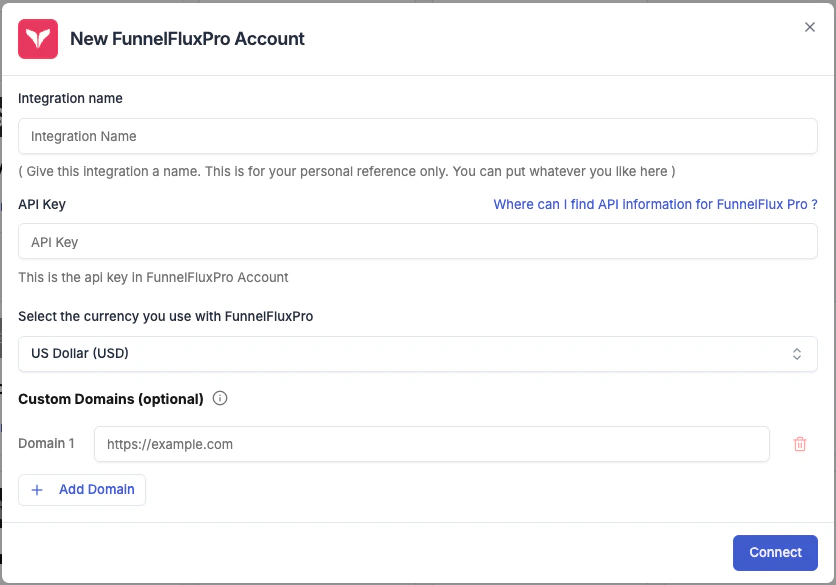
- Integration name — a label for this connection (e.g. “FunnelFlux Pro – Brand A”).
- API Key — paste the API Key from your FunnelFlux Pro account.
- Currency — the currency your tracker reports revenue in. Must match your tracker’s settings.
- Conversion registration time — choose Visit time (conversion counted when user lands) or Postback time (counted when conversion fires). Match this to your tracker’s setup.
- Custom Domains (optional) — if you use custom tracking domains in FunnelFlux Pro, add them here using the + Add Domain button.
Configure for Your Ad Networks
After saving the credentials, TheOptimizer prompts you to configure the tracker for each connected ad network. This step tells the platform how to match FunnelFlux Pro data to your campaigns.Click Configure → next to each ad network and select the tracking template that matches how you set up FunnelFlux Pro for that network.Understanding tracking templatesA tracking template is a set of macros that maps your tracker’s URL parameters to ad network identifiers (Campaign ID, Ad Set ID, Ad ID, Placement). The dropdown shows all templates available from your FunnelFlux Pro account. Select the one you use for that ad network.Once a template is selected, the connection status for that ad network updates to Connected.
Ad networks where you have not selected a tracking template will not receive any data from FunnelFlux Pro. Configure every network you actively use.
Add Tracking Parameters to Your Campaigns
TheOptimizer generates a tracking parameters code at the end of setup. Add this URL parameter string to your campaigns on each ad network. This is what allows FunnelFlux Pro to receive the correct campaign and ad identifiers and report them back.Without this step, FunnelFlux Pro will receive visits but won’t be able to match them to specific campaigns — no conversion or revenue data will appear in TheOptimizer.