![]() Written by Support. Updated over a week ago
Written by Support. Updated over a week ago
This article will guide you through the step-by-step process of how to connect your ActiveRevenue account to TheOptimizer Native.
Once you have successfully logged in to your TheOptimizer Native account, click on the Account Wizard on the left-side panel of your screen then follow the 5 steps below.
Step 1: When on the Account Wizard page, click on Add new button.
Step 2: On the pop-up integration, click on the traffic source drop-down list and select ActiveRevenue.
Step 3: Fill in the required information as noted in the screenshot below.
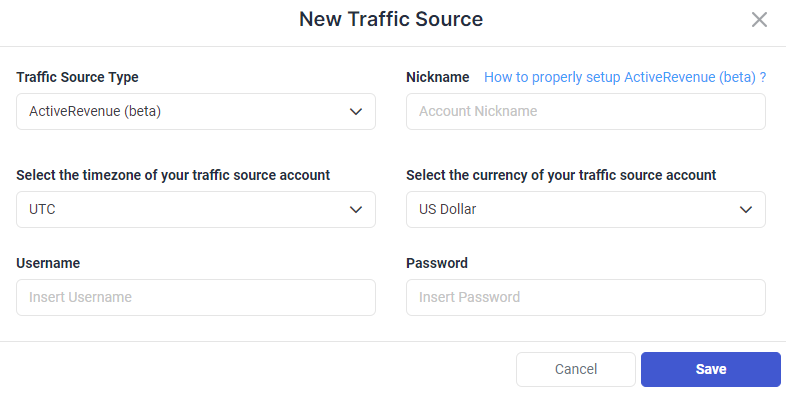
Time Zone and Currency Selection – Please make sure to select the correct time zone and currency based on the settings your account was set up with. Failing to set the correct values may result in campaign statistics discrepancies.
Step 4: Click Save and move to the next step to connect your tracking platform or finish the process if you don’t use a click tracker.
Required input information details:
– Nickname: Add a friendly name for the ActiveRevenue account you are about to connect.
– Email: Enter the email address associated with your ActiveRevenue account.
– Password: Enter the password associated with your ActiveRevenue account.
– Time zone: Specify the reporting time zone of your ActiveRevenue account.
– Currency: Specify the currency your ActiveRevenue account is set up with.
Click here for more information on how to connect your tracking platform to TheOptimizer Native.