
Documentation Index

Fetch the complete documentation index at: https://theoptimizer.io/docs/llms.txt

Use this file to discover all available pages before exploring further.

Campaigns Compare Dates Dialog

Setting a Date Range

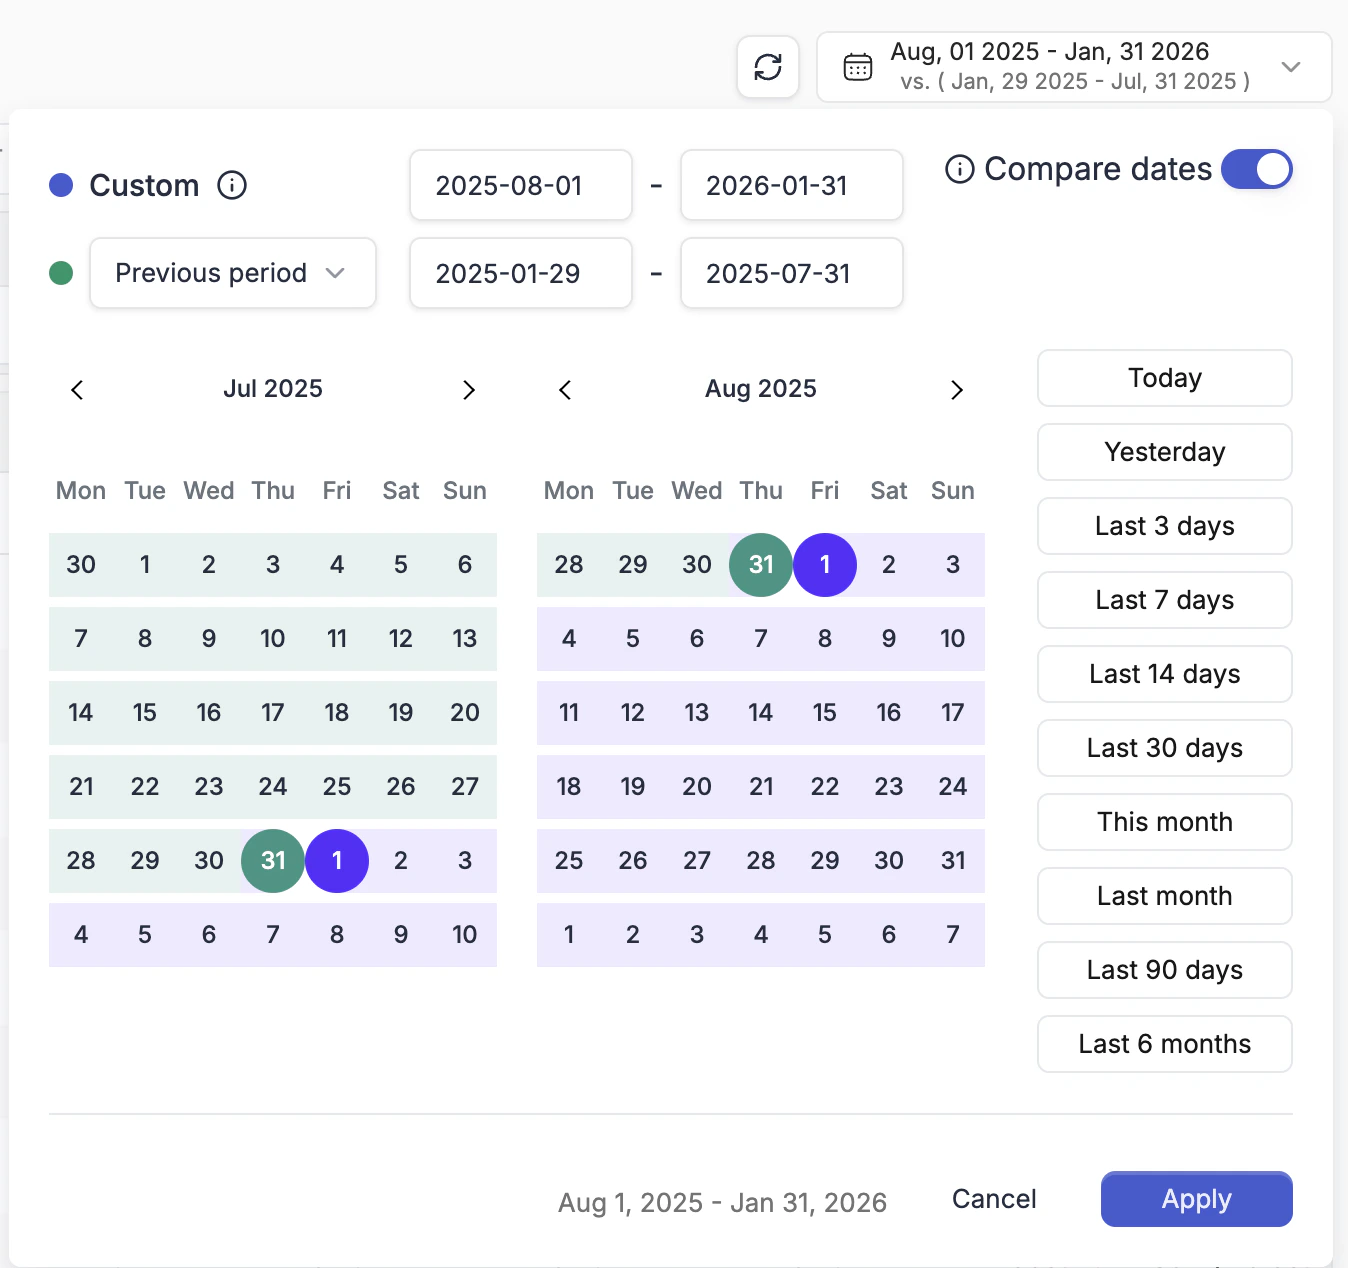
The date picker is in the top-right corner of the navigation bar. Click it to change the reporting interval for the entire view. Available presets: Today, Yesterday, Last 3 / 7 / 14 / 30 days, Last 90 days, This month, Last month, Last 6 months, and a fully custom calendar range.

Comparing Two Periods

Inside the date picker, enable the Compare dates toggle. You can then select a second date range to compare against the primary one.
Use Compare dates to spot performance shifts between periods — for example, this week vs. last week — to measure the impact of a recent creative or budget change.

Choosing Which Columns Show Comparison Data

Comparison data only appears for metrics you have designated as compare columns. You configure this inside Column Management.
1

Open Column Management

Click the column settings icon at the bottom-left of the table.
2

Switch to Compare Columns

Click the Compare Columns tab at the top right of the dialog.
3

Select your metrics

Select the metrics you want to see side-by-side comparison data for (e.g., Amount Spent, Revenue, Conversions).
4

Save as preset

Click Save as preset.
Once set up, activating Compare dates in the date picker causes each selected metric to display an additional column showing the value for the comparison period — making it easy to see at a glance whether spend went up, conversions dropped, or ROI improved between the two periods.