A step-by-step guide on how to integrate Assertive Yield to TheOptimizer Native
![]() Written by Support. Updated over a week ago
Written by Support. Updated over a week ago
After you have finished connecting one or more of the supported traffic source accounts in the first step of the Account Wizard process, you can continue connecting your Assertive Yield account in order to have both traffic source and Assertive Yield revenue data aggregated in one place.
Follow the steps below to connect your Assertive Yield account to TheOptimizer Native.
Step 1: Click on the Account Wizard, then select or add a traffic source account and then click Next.
Step 2: In the second step of the Account Wizard, click on Add New to start connecting your AssertiveYield account.
Step 3: In the pop-up integration screen, click on the Select Tracking Platform drop-down list and select Assertive Yield.
Step 4: Fill in the required information as noted in the screenshot below then click Save and Next to move to the next step.
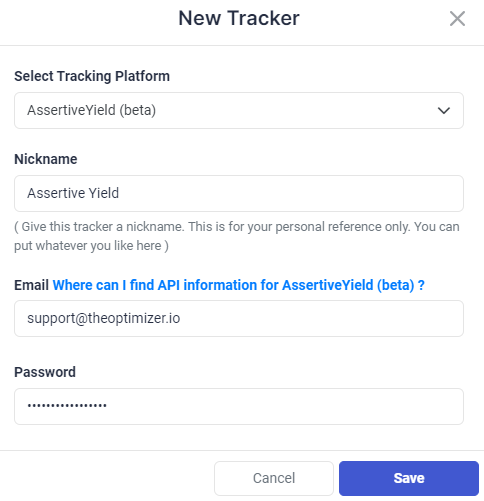
Required input information details:
- Nickname: Add a friendly, easy-to-recognize name for your Assertive Yield account.
- Email: Email address associated with your Assertive Yield account.
- Password: Password used to access your Assertive Yield account.
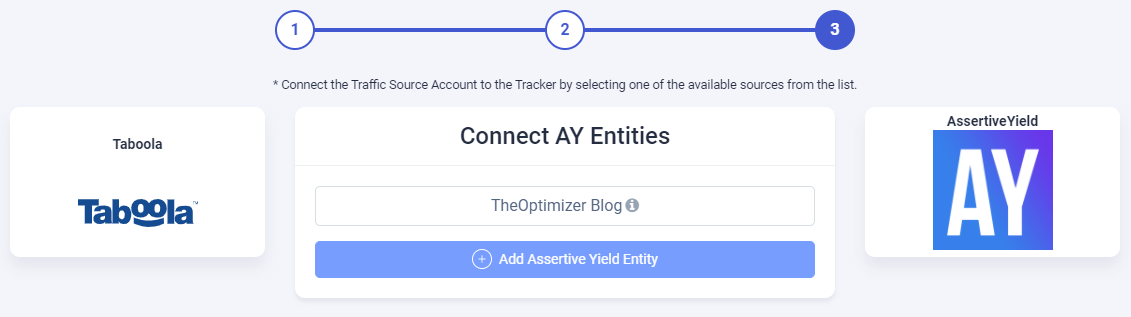
Step 5: In the third and final step of the Account Wizard, click on Add Assertive Yield Entity to add a web property tracked via Assertive Yeid and specify the tracking token mapping used to track the performance of your web property.
When adding an Assertive Yield entity there are two options to configure your mapping.
Option A: Use a one-on-one tracking token mapping.

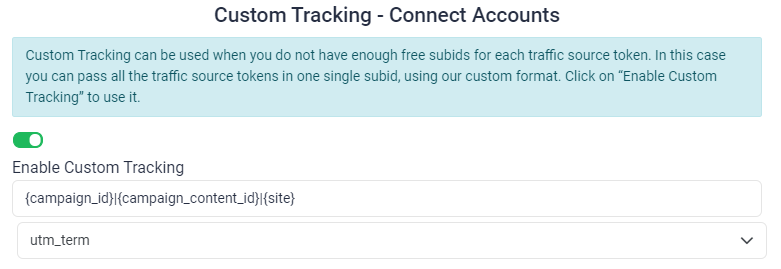
Option B: Use a custom concatenated tracking value.
Once you have specified the tracking configuration, click Save, then Finish to finalize the integration process.
Additional Clarification
When using a one-on-one tracking token configuration you will have to pass the unique tracking IDs from the traffic source directly to your UTM parameters. This will directly affect the way that you will see your campaigns reported in Google Analytics. Instead of seeing the campaign name under campaigns on your Google Analytics, you will see the unique campaign ID as reported by the traffic source, or instead of viewing the medium or source, you will see the unique ID of the publisher site or ad id.
To support our users’ current UTM tracking configurations, we have enabled the ability to pass all required tracking values in a single UTM parameter. This way all previous configurations can be kept as they are while still being able to correctly match the information from the traffic source and Assertive Yield. See examples below:
- Taboola: &utm_term={campaign_id}|{site}|{campaign_item_id}
- Outbrain: &utm_term={{campaign_id}}|{{publisher_id}}|{{section_id}}|{{ad_id}}
- RevContent: &utm_term={boost_id}|{content_id}|{adv_targets}|{widget_id}
- Yahoo Gemini: &utm_term={campaignid}|${pubid}|{device}|${SUPPLY_NAME}|{adgroupid}|{adid}
- MGID: &utm_term={campaign_id}|{widget_id}|{teaser_id}
- AdsKeeper: &utm_term={campaign_id}|{widget_id}|{teaser_id}
- TikTok: &utm_term=__CAMPAIGN_ID__|__AID__|__CID__
- Facebook: &utm_term={{campaign.id}}|{{adset.id}}|{{ad.id}}